To test our applications we will need an Android Virtual Device (AVD). It is an Android smartphone emulator, where Eclipse can install and launch our applications. Let’s create it.
Translated by Taras Leskiv (http://android-by-example.blogspot.com/)
Launch Eclipse.
Go to Windows -> Android SDK and AVD Manager (in newer versions - Android AVD Manager)
Choose Virtual Devices on the left.
Click New.
In the Target list Android platforms of different versions are presented. We've downloaded them in previous lesson as the last step. Choose the right version and see the information about it.
Return to Eclipse. Let’s choose platform 2.3.3 (API Level 10) from the list. And let’s give it the corresponding name - AVD_233. Let’s also specify the size of SD Card = 100 and HVGA Screen mode.
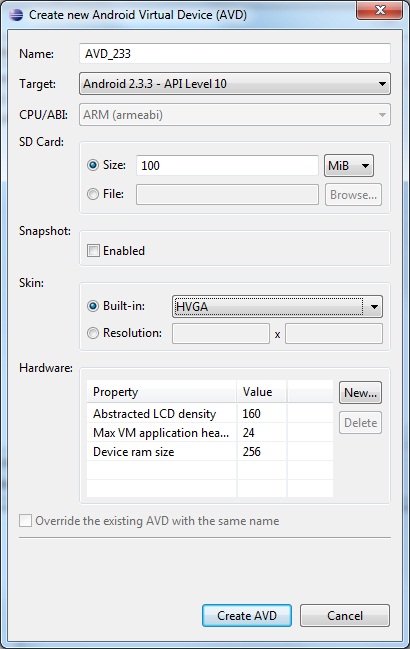
Press Create AVD and close AVD Manager
Finally, we can create our first application and see how it works.
There multiple versions of wizard for creating a project as Google constantly changes them! Look for the one that suits you the best. They are sorted by date, the newest first.
Version from 12/11/2012
In Eclipse go to File > New > Project
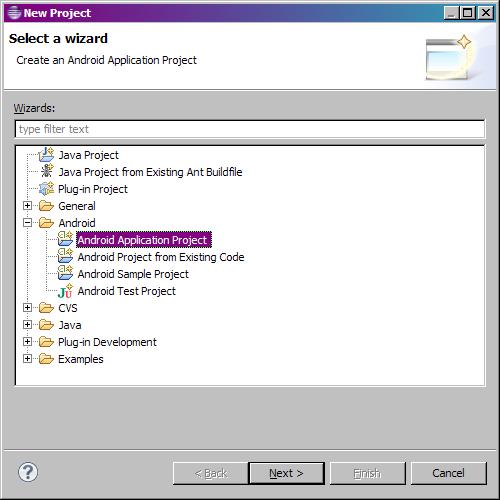
Choose the project type - Android > Android Application Project, click Next
The window for creating a project appears.
Let’s fill it in.
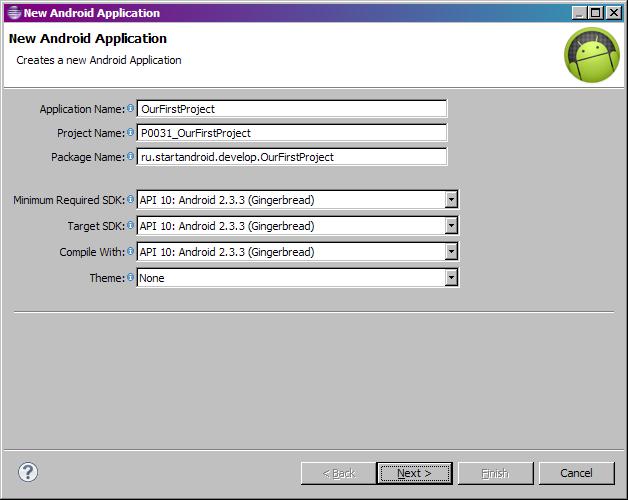
Let’s begin with a Project Name - it is the name of the project that will be displayed in the list of projects on the left. As we will have many projects, I propose to think up a prefix for names. It would be easier to return to older projects and they will be structured nicely and conveniently.
The prefix can be like this: P<lesson number(000)><lesson project number(0)>. We will leave three numbers for the lesson number and one for the project number. Let’s add some logical name to the prefix (OurFirstProject) and we will get the name of our first project of the third lesson - P0031_OurFirstProject.
Application name - it’s directly the name of the application, which will be displayed in the device application list. We can specify the project name without a prefix.
Package name - Java term, explained in details here. Shortly, it is a prefix for classes names of our application. I will be using ru.startandroid.develop.<application name>
Minimum Required SDK defines the minimum Android Version within which the application will launch. Let’s choose the same as while creating AVD - 2.3.3.
Compile With defines the abilities of which Android version will the application use. Specify 2.3.3 here.
Target SDK defines the maximum Android version, on which you have tested your application. It’s required for compatibility modes. Specify also 2.3.3 here.
Do not specify a Theme for now, choose None
Click Next
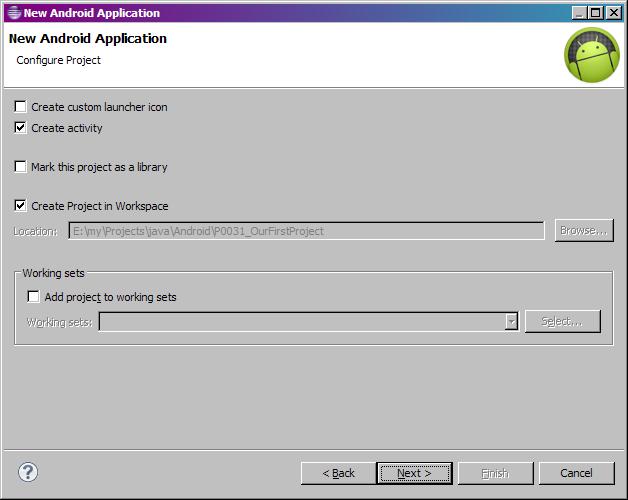
From ticks leave only
Create Activity - immediately after the project creation the Activity will be created, not to create it manually.
Create Project in Workspace. Project will be created and saved in the default workspace.
Click Next
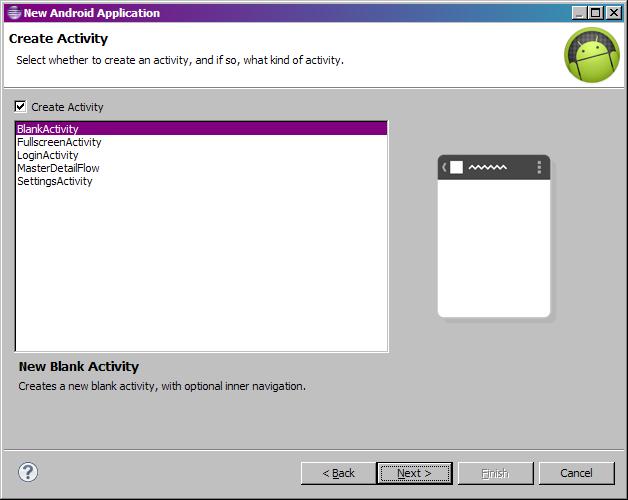
Choose BlankActivity
Click Next
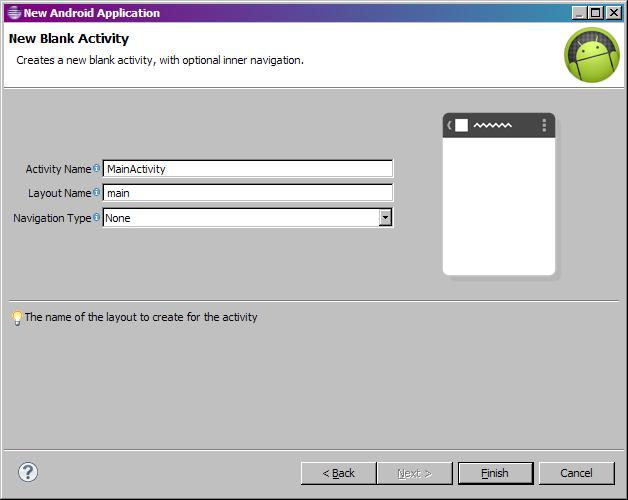
Make sure here, that in field Activity Name MainActivity is specified, and in field Layout Name enter main. Navigation Type - None.
Click Finish.
The project has been created.
07/10/2012 Variant
In Eclipse go to File > New > Project

Choose the project type - Android > Android Application Project, click Next
The window for creating a project appears.
Let’s fill it in.
Let’s begin with a Project Name - it is the name of the project that will be displayed in the list of projects on the left. As we will have many projects, I propose to think up a prefix for names. It would be easier to return to older projects and they will be structured nicely and conveniently.
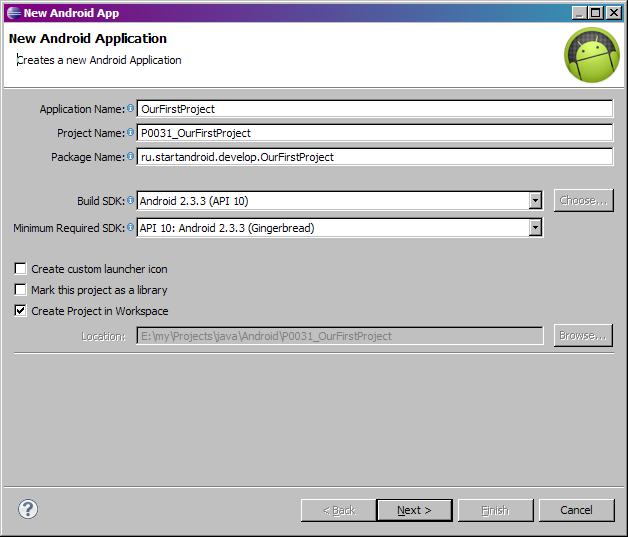
The prefix can be like this: P<lesson number(000)><lesson project number(0)>. We will leave three numbers for the lesson number and one for the project number. Let’s add some logical name to the prefix (OurFirstProject) and we will get the name of our first project of the third lesson - P0031_OurFirstProject.
Application name - it’s directly the name of the application, which will be displayed in the device application list. We can specify the project name without a prefix.
Package name - Java term, explained in details here. Shortly, it is a prefix for classes names of our application. I will be using ru.startandroid.develop.<application name>
Build SDK defines the abilities of which Android version will the application use. Let’s choose the same as while creating AVD - 2.3.3.
Minimum Required SDK defines the minimum Android Version within which the application will launch. Let’s make it the same as Build SDK - 2.3.3.
From ticks leave only Create Project in Workspace. The project will be created in the default workspace.
Click Next
The window for Activity creation opens.
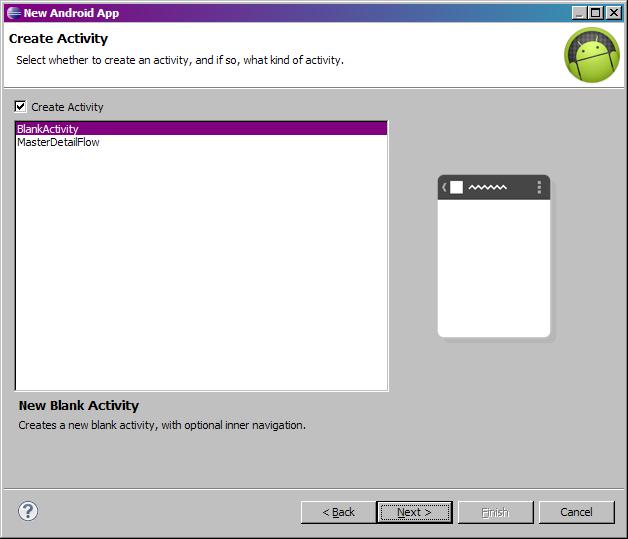
Choose BlankActivity here and click Next.
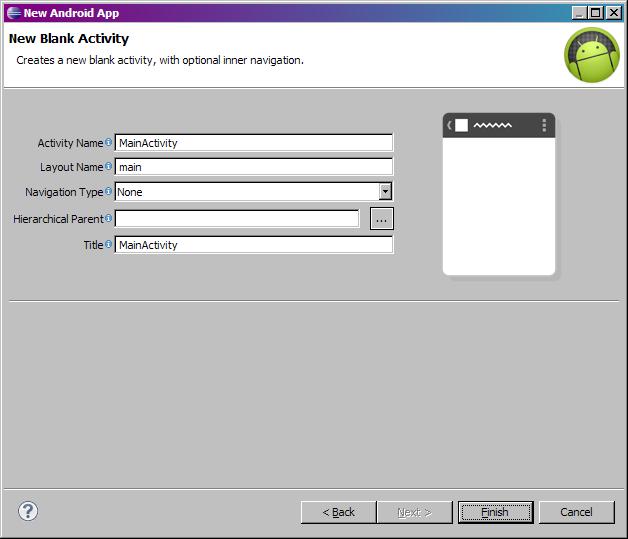
Make sure here, that in field Activity Name MainActivity is specified, and in field Layout Name enter main. Do not touch other fields.
Click Finish
The project has been created.
Old variant
In Eclipse go to File > New > Project
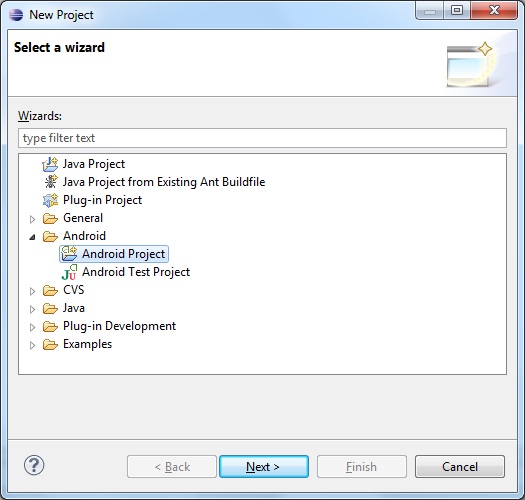
Choose the project type - Android > Android Application Project, click Next
The window for creating a project appears. In newer versions this window is splitted into three.
Let’s fill it in.
Let’s begin with a Project Name - it is the name of the project that will be displayed in the list of projects on the left. As we will have many projects, I propose to think up a prefix for names. It would be easier to return to older projects and they will be structured nicely and conveniently.
The prefix can be like this: P<lesson number(000)><lesson project number(0)>. We will leave three numbers for the lesson number and one for the project number. Let’s add some logical name to the prefix (OurFirstProject) and we will get the name of our first project of the third lesson - P0031_OurFirstProject.
Build Target defines the abilities of which Android version will the application use. Let’s choose the same as while creating AVD - 2.3.3.
Application name - it’s directly the name of the application, which will be displayed in the device application list. We can specify the project name without a prefix.
Package name - Java term, explained in details here. Shortly, it is a prefix for classes names of our application. I will be using ru.startandroid.develop.<application name>
Create Activity - the name of Activity class (application screen). Let’s specify MainActivity for instance.
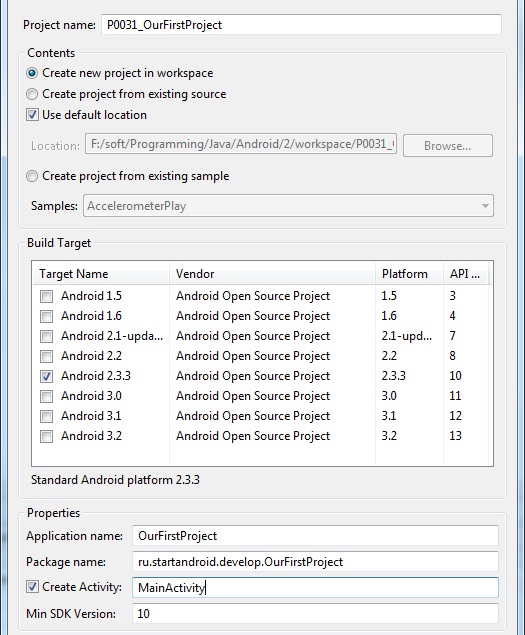
Leave everything else as it is. Click Finish.
The project has been created.
Screenshots below may differ for different versions but not much.
On the left our project appeared, let’s expand the project. We will look through the most important and frequently used folders and files.
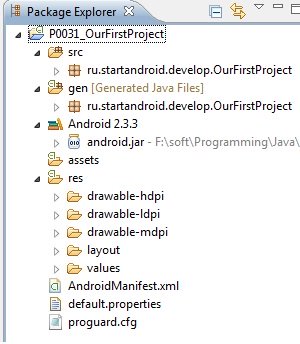
src - all our written source code will be situated in this folder
gen - filed generated by the environment that the application requires. You better not touch anything here. (If there is no such folder - edit something in the project and click Save button).
Android 2.3.3 - Android libraries required for the application
assets and res - folders for resource files of different type
AndroidManifest.xml - manifest or configuration file of the application
We will use all this later and it will be clear what it’s needed for.
Select the project name on the left.

and let’s run it - press CTRL + 11,
then choose Android Application
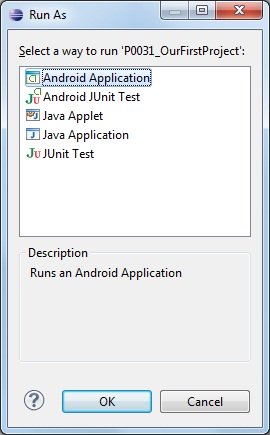
click OK.
The emulator will be launched, I advise not to touch or press anything, because it’s laggy and unstable thing. Startup time is approximately one minute. Wait until the following strings appear in Eclipse console.
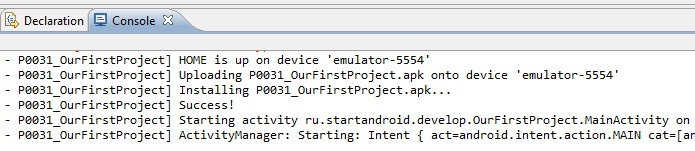
The application is installed on the emulator and is running. Unlock the emulator screen (if it is locked) and observe our application.
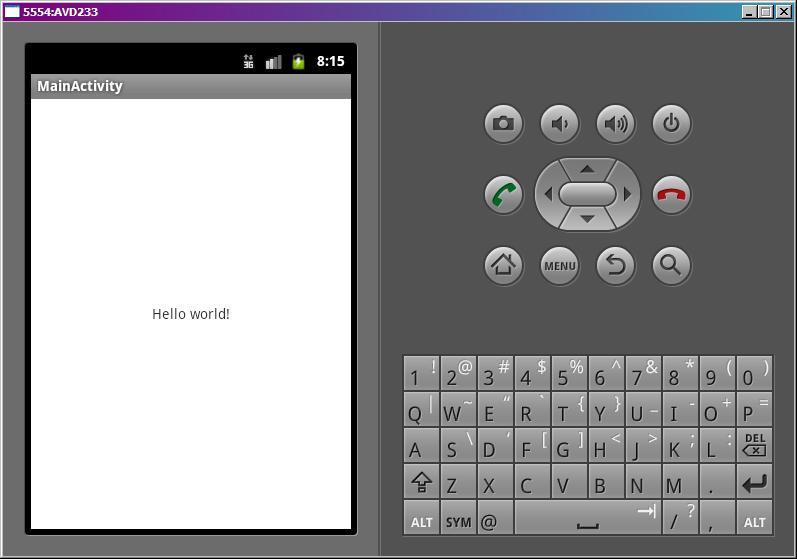
You can see the name of the application and the name of the Activity. We have just created and launched our first application.
If you didn’t manage to launch it and there is a message like this in Eclipse console "emulator-5554 disconnected! Cancelling 'ru.startandroid.develop.OurFirstProject.MainAct activity launch'!" - close the emulator and try again. If you didn’t manage to do it again - restart Eclipse. If failed again - reboot. If it doesn’t work even now - delete the AVD and create a new one. Finally it should work, even if not from the first try.
The main thing here - after running the application (CTRL + F11) try to make as few motions as you can on your computer. I have spotted a clear tendency - if you switch different windows while emulator is starting, it launches with faults. But if you sit and wait for a minute - everything would be fine. And turn off all the other procedures like video rendering that load the system.
You can read about the emulator in more detail here.
In the next lesson we will add different elements to our application and change their properties.
Присоединяйтесь к нам в Telegram:
- в канале StartAndroid публикуются ссылки на новые статьи с сайта startandroid.ru и интересные материалы с хабра, medium.com и т.п.
- в чатах решаем возникающие вопросы и проблемы по различным темам: Android, Compose, Kotlin, RxJava, Dagger, Тестирование, Performance
- ну и если просто хочется поговорить с коллегами по разработке, то есть чат Флудильня

")